Benefits of the Soil Borehole Shear Test
- Immediate results save the owner and engineer time and money, particularly with failed slopes
- Measures the drained shear strength of soils in place
New developments to measure for residual effective shear strength and dynamic shear strength - Used for designing earth slopes, retaining walls and determining the bearing capacity of foundations
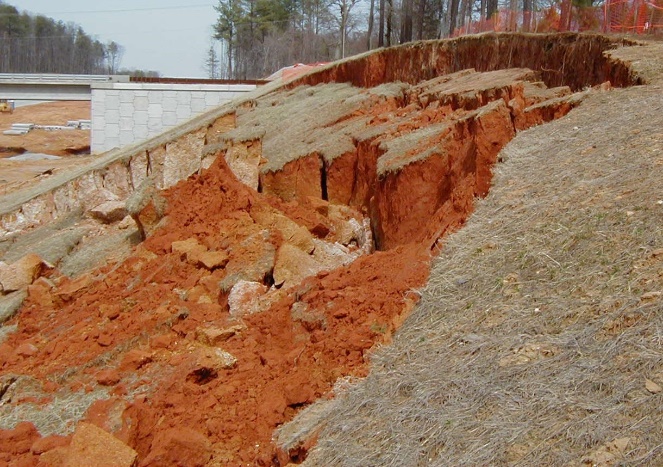
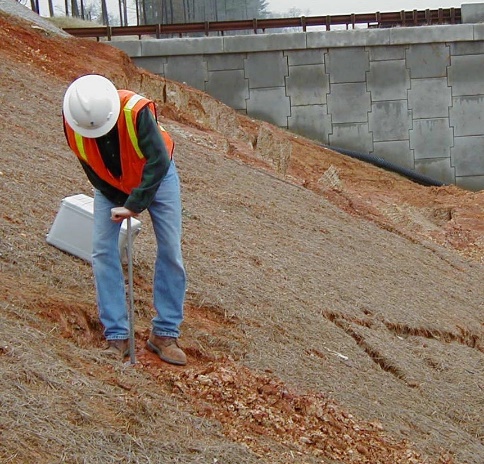
Figure 1: Preparing the borehole for the BST with a hand auger for failed slope
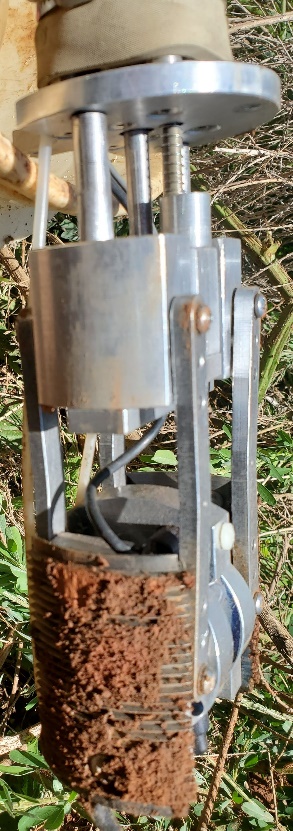
Performing the borehole shear test: The shear head plates must fully embed into the soil. For loose sand or soft to medium stiff clay with an approximate N60 value less than 15 blows per foot, the engineer should use the standard 2-inch tall and 2.5-inch arced width plates (each face has an area of 5 inch2 and a total area of 10 inch2) (Figure 2). For denser or harder soil, he/she should use the smaller 1-inch tall and 0.8-inch arced width plates (each face has an area of 0.8 inch2 and a total area of 1.6 inch2) because in stronger soil the larger plates will not fully embed into the soil and the soil will progressively fail instead of shear. Figure 3 shows the small plates in their closed and fully opened positions. Because the pressure gauges are calibrated to measure the stress of the larger (standard size) plates, for the smaller plates the recorded pressures must be multiplied by 6.25 to calculate the stresses accounting for the differences in the plate areas.
Figure 2: Standard shear head plates
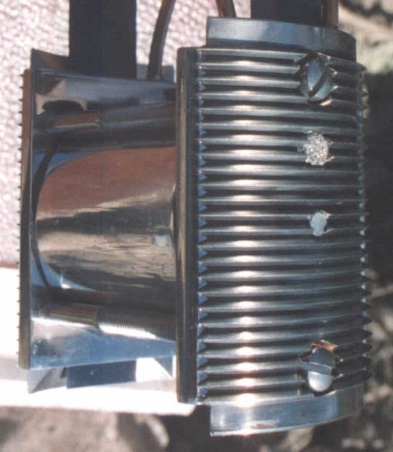
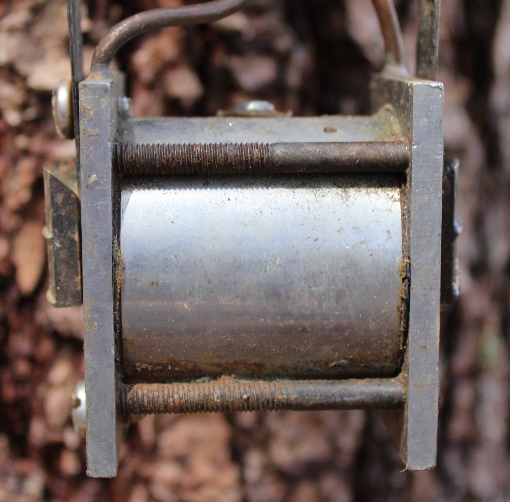
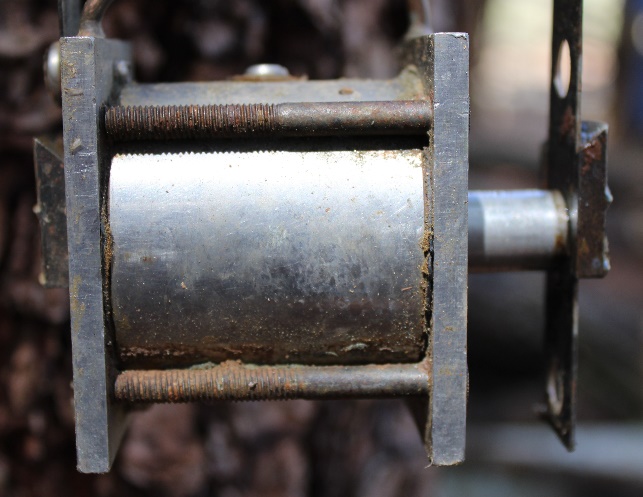
Figure 3: Borehole shear test small plates in closed and fully opened positions
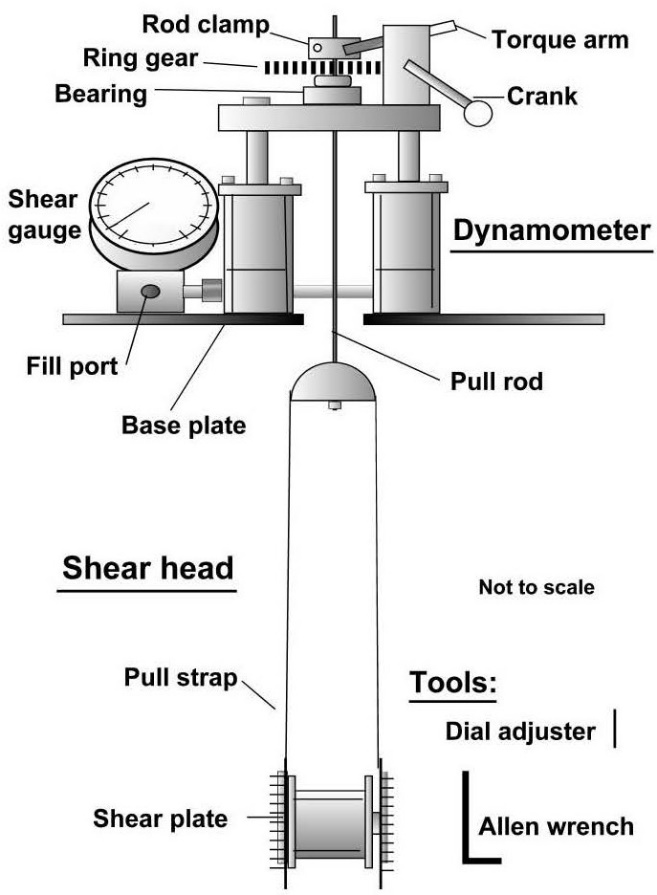
The engineer and driller lower the borehole shear head to the test depth, adding the 3/8-inch (10 mm) diameter galvanized pull rods as needed. The engineer sets the base plate over the pull rod onto either the hollow-stem auger or steel drill casing or ground surface for a hand-augered borehole. Next, he/she places the acme gear and thrust bearing through the pull rod and onto the dynamometer top plate, supported by two dynamometers 180o apart. To prevent binding, the dynamometer top plate can move slightly laterally. The two dynamometers filled with jack oil connect to shear pressure gauge. The engineer lowers the pull rods/shear head to the test depth, holds them at least 1 inch (2.5 cm) above the bottom (so that they hang freely) and tightens the allen cap screw of the rod clamp, keeping the shear head at its desired test depth. Figure 4 presents the BST set-up, labelling the parts.
Figure 4: Schematic of Borehole Shear Test
The engineer reads and records the initial shear and normal stress gauges (tare values). While the initial normal stress gauge measurement should not change much between tests, the initial shear stress gauge measurement increases for deeper tests because of the additional weight of the extra pull rods. By screwing in the air pressure regulator, the engineer applies the normal stress pushing apart two serrated stainless-steel plates and pressing them laterally into the sidewalls of a borehole. Figure 5 shows Failmezger applying the normal stress to the shear head. Table 1 suggests the initial normal stress to apply depending on the estimated strength and soil type. The initial stress usually becomes the normal stress increment for the rest of the shear test increments.
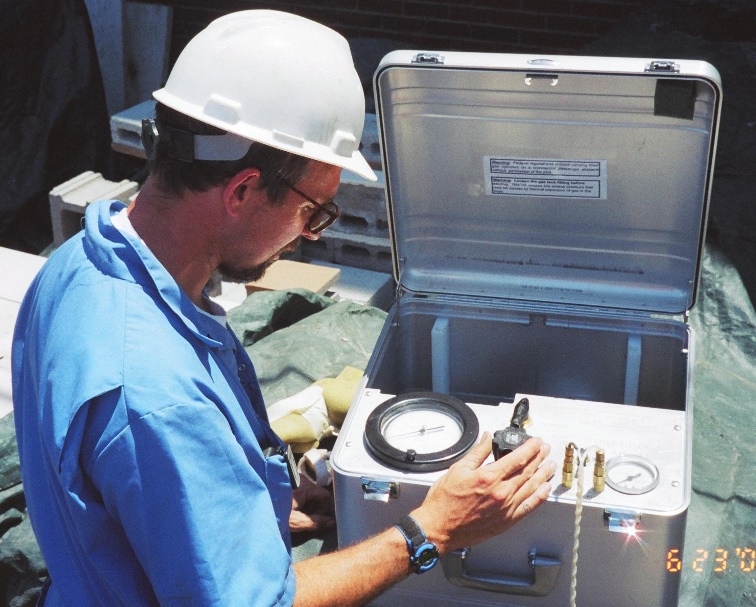
Figure 5: BST control unit applying normal stress
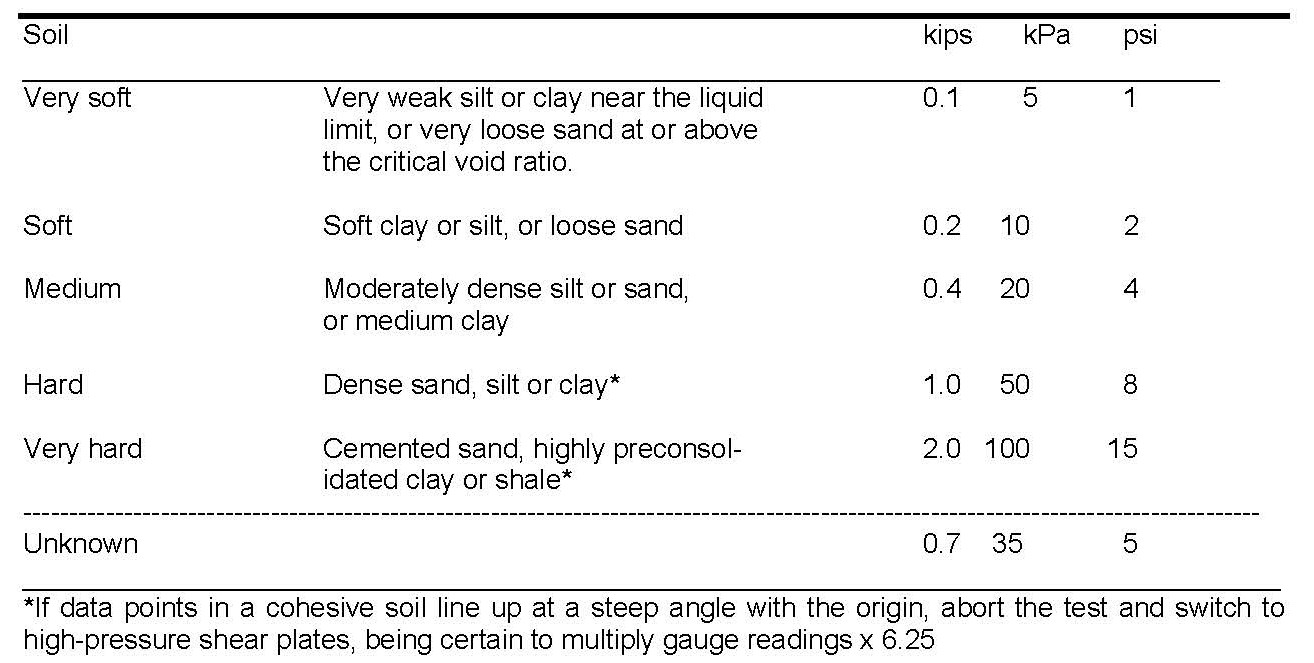
Table 1: Recommended normal stress increments
After allowing the soil to consolidate at the applied normal stress, usually between 5 minutes for cohesionless soil and about 15 to 20 minutes for cohesive soil, then he/she rotates the crank handle at a rate of 2 revolutions per second that turns the acme gear, pulling the shear head upward. Each revolution of the crank handle pulls the shear head upward 0.001 inch (0.025 mm). As the engineer turns the crank, he/she watches the shear stress gauge pressure increase until it reaches its peak value, which occurs after about one or two revolutions of the acme gear. The engineer records the peak shear stress and its normal stress, then subtracts from them their initial gauge pressure readings or tare readings, and plots their corrected stress values. If the small plates shear the soil, then multiply the gauge readings by 6.25 to get the stresses.
He/she then increases the normal stress by the normal stress increment, pushing the shear plates farther into the soil and moving the failure surface farther out, shearing different soil particles. Because consolidation times are cumulative, the engineer only needs to wait 5 minutes before shearing. Typically, the engineer shears the soil four to five times at progressively higher normal stresses. In sands, silts, and stiff clays, the BST provides a drained test, while results for softer cohesive soils may be partially drained. An available pore pressure sensor located in the shear head indicates drainage. Lutenegger and Tierney, 1986, studied the effects of pore pressure and found that consolidation time of 20 minutes were necessary in clay and staged tests minimized their effects more than fresh shear tests.
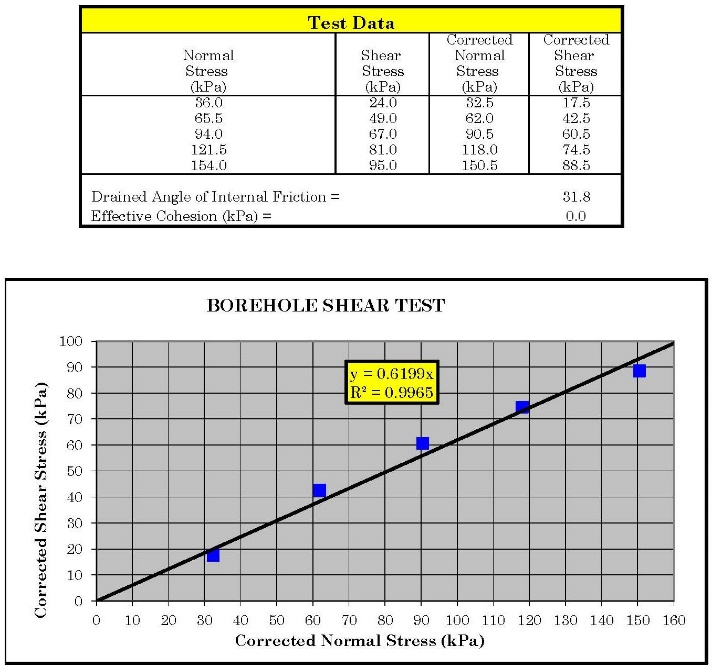
Figure 6: Example Borehole Shear Test Data
The engineer can usually fit a line through the corrected shear stress/normal stress data with a coefficient of correlation of 0.99 or better because he/she essentially tests the same soil. Figure 6 presents an example of borehole shear test data and its resulting shear strength plot.
Residual shear strength: In over-consolidated clays, by repeatedly shearing the clay, the engineer can measure its residual shear strength. After measuring the peak shear strength value for a normal stress, he/she collapses the BST shear plates and lowers them back to the starting depth for the data point by turning the handle backwards. The engineer applies a normal stress equal to about 90% of the normal stress used to measure the peak value to the clay. He/she pulls the shear plates upward to the ending distance of the peak value, measuring the shear stress. The engineer repeats this procedure and records the shear stress each time watching it decreases until it becomes a constant minimum value (usually after about 4 measurements). Figure 7 shows an example of residual borehole shear test data.
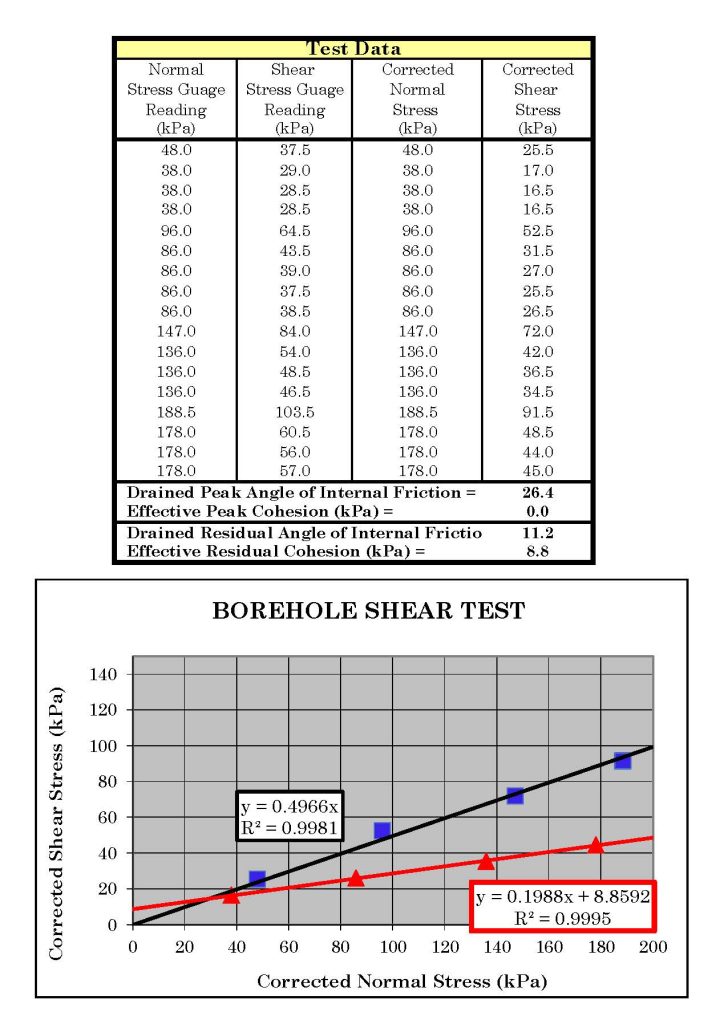
Figure 7: Example of residual borehole shear test data and plots
Automated Borehole Shear Test Equipment (ABST): A computer can perform all the manual tasks and measurements made by an engineer to perform a borehole shear test. Using pressure transducers and a stepper motor, a field computer measures and controls the applied normal stress and its consolidation time, pulls the shear head upward at a controlled speed of 0.002 inch/second, and measures and plots the normal and shear stresses. After the engineer enters the desired normal stresses and consolidation times into the field computer, he/she pushes the “start test” button and watches the computer perform the borehole shear test and plot the results as it collects and measures the normal and shear stresses. Figure 8 shows the shear plate and stepper motor in the field performing an automated borehole shear test. Figure 9 shows the computer screen for controlling the automated BST.
Figure 8: Shear Plate and Stepper Motor of ABST
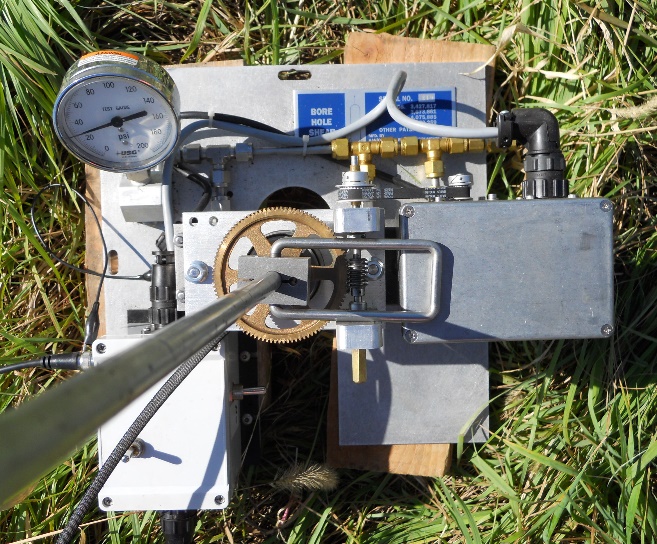
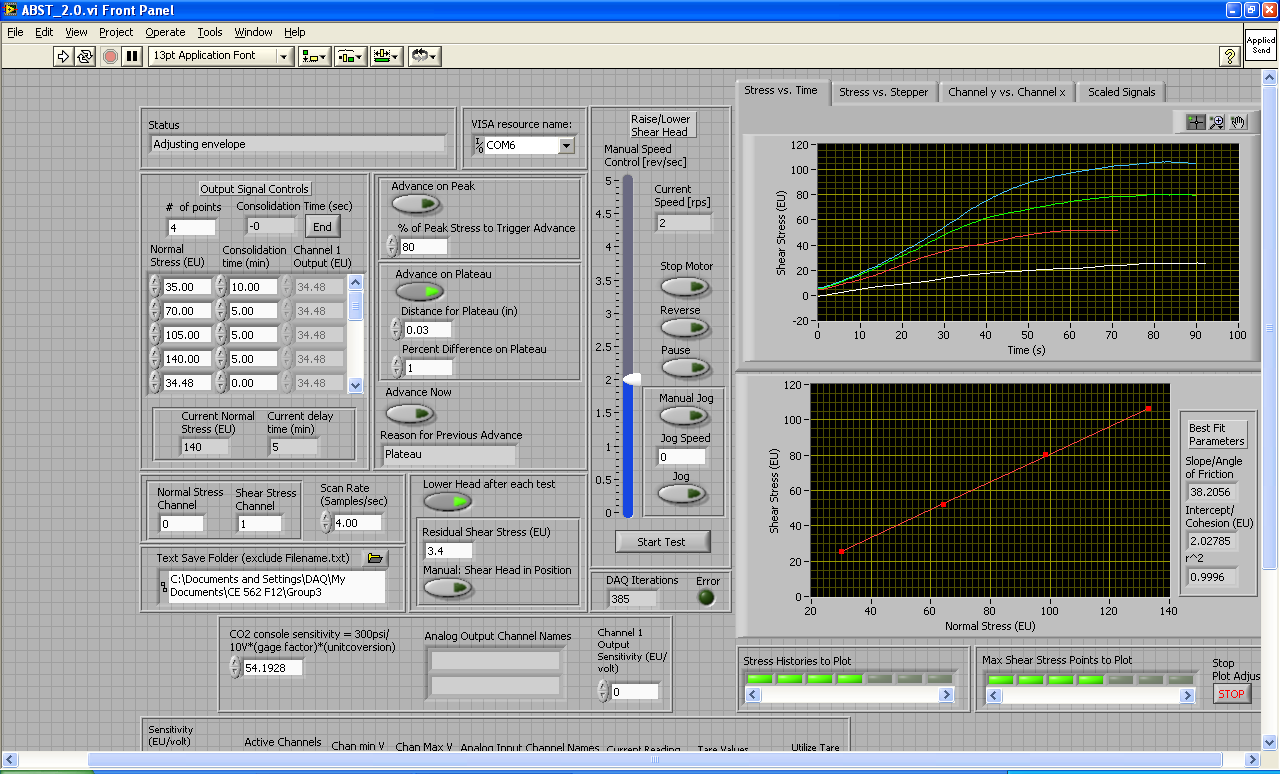
Figure 9: Computer screen for controlling the automated borehole shear test
Dr. Dick Handy and Ted Bechtum, graduate student, perform ABST in field (Figure 10) and Dr. Jeramy Ashlock and Ted Bechtum perform ABST in field (Figure 11). Dr. Dick Handy astutely watches the entire ABST (Figure 12).
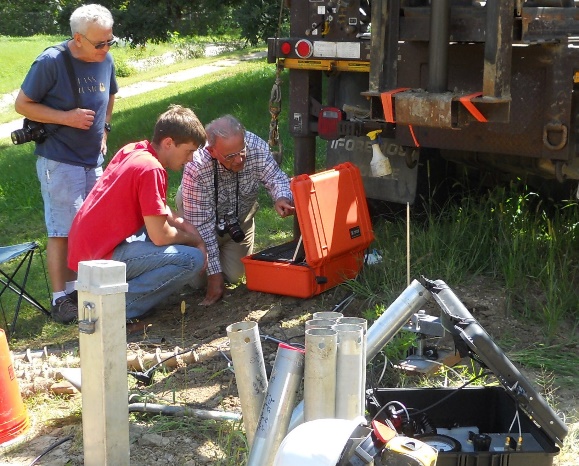
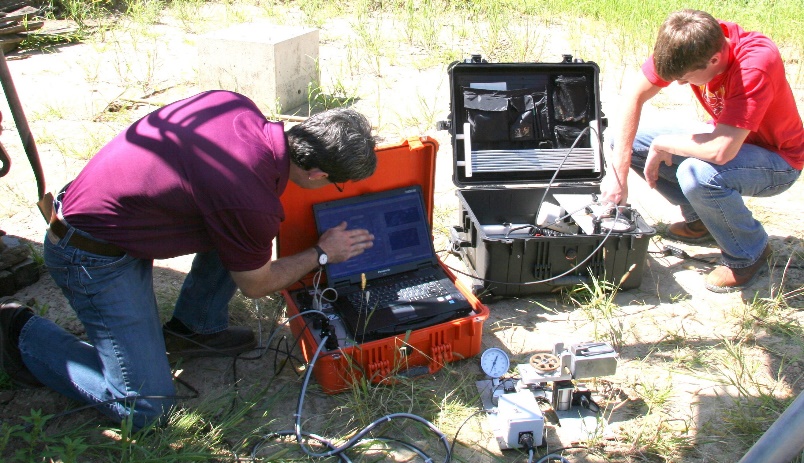
Figures 10 and 11: Dick Handy with Grad Student; Jeramy Ashlock with Grad Student (ABST)
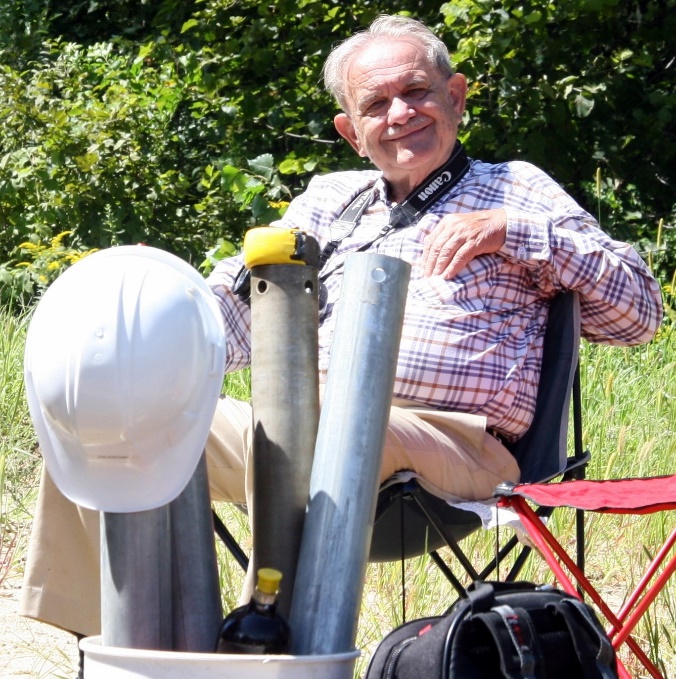
Figure 12: Dr. Dick Handy in field overseeing ABST
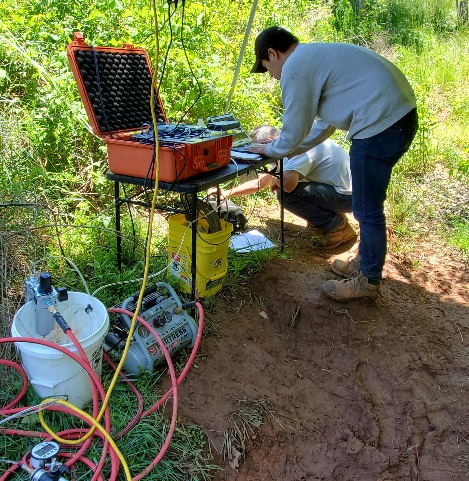
Cyclic Borehole Shear Test: Dr. Jeramy Ashlock and his Ph. D. student, Hasung Kim, continue to develop an instrumented borehole shear test head that measures the stresses downhole at the shear head and transmits them to a data acquisition computer. This device uses an inflatable rubber cylindrical membrane with outer serrated stainless-steel grippers that anchors the shear head. Air cylinders use this anchor for reaction to push or pull the shear head. A field computer controls the testing procedure, allowing the engineer to perform 1) a standard BST test measuring the peak shear strength, 2) repeatedly shearing the soil at the same normal stress measuring the residual shear strength, and 3) rapidly moving the shear head up and down at 5 Hz measuring the dynamic shear strength (perhaps the most interesting—no other in-situ test can make these measurements). Figure 13 shows Hasung Kim performing a cyclic borehole shear test. Figure 14 shows a close-up photo of the cyclic shear head and Figure 15 shows a photo of the cyclic borehole shear head and anchor.
Figure 13: Performing a CBST
Figures 14 and 15: Photos of the cyclic borehole shear test heads
